Shading the Winter Explosion

By Hammer Chen, Kristin Ivanova
We recently introduced the Artillery Explosion tutorial available in Phoenix FD’s documentation. Now, we want to show you a variation of this scene setup - a winter explosion with its proper shading.
This scene is essentially the same as the Artillery Explosion one, except for the smoke color and HDRI lighting. The smoke color is set to light gray in order to get a snowy look. To focus on the shading we also limit the number of bombs to just one.
Since there is a hot explosion at the core, it could make the rendering over-exposed or lose detail in the white smoke volumetric shading.
The good news is Phoenix FD provides a cohort of parameters allowing you to fine-tune the shading. Here we compare some of the useful settings that deal with this issue.
Overall Setup
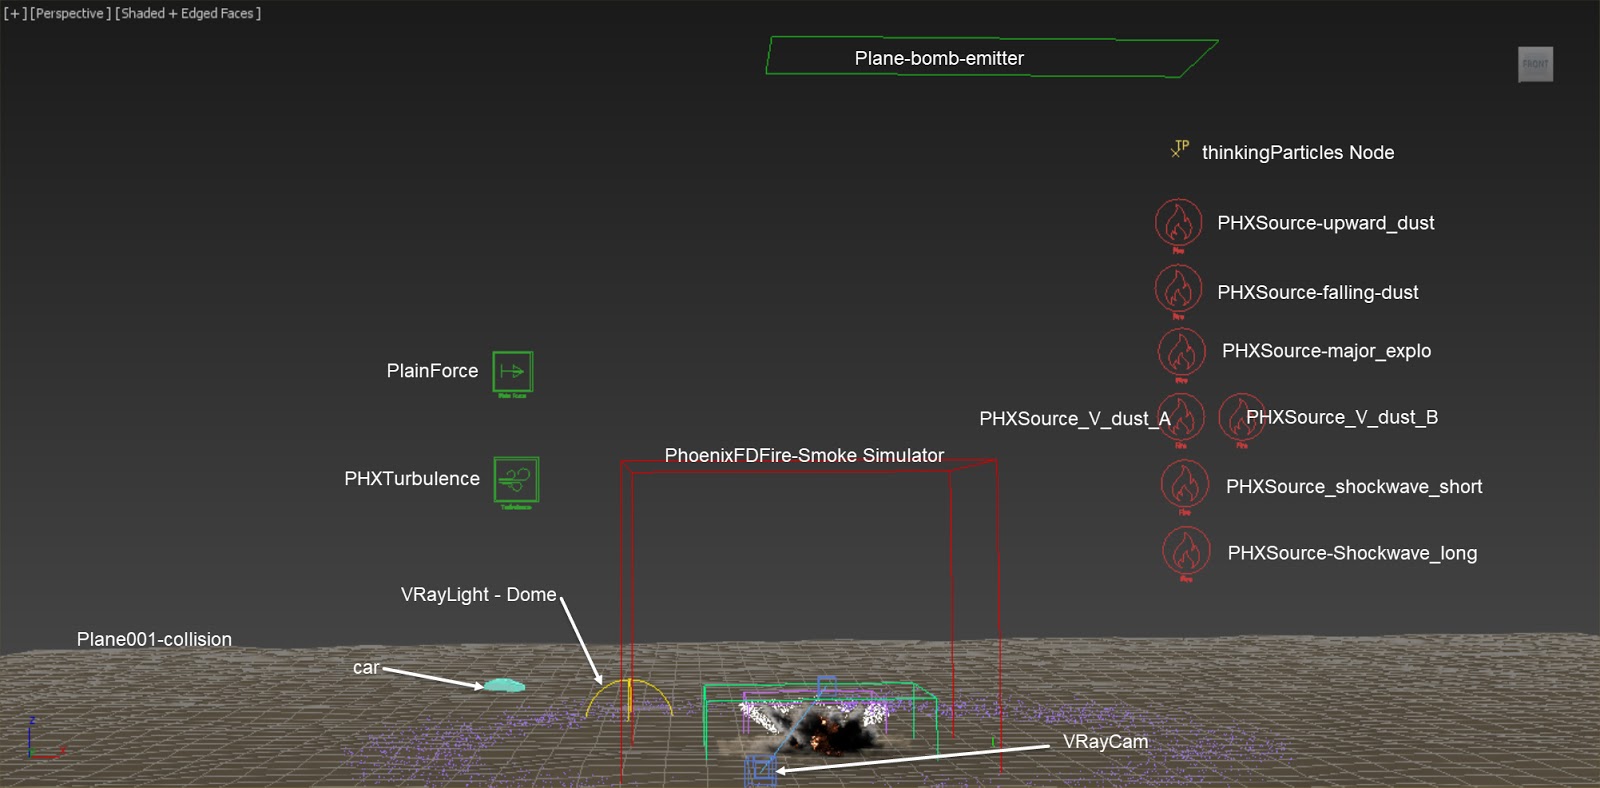
The scene we use here is modified from the Artillery Explosion scene, except we add one Phoenix FD Turbulence helper and change the color of the smoke. For a step-by-step tutorial of how the Fire / Smoke sources and thinkingParticles are set up, please check out the Artillery Explosion tutorial.


- Light Power On Self controls the light intensity of the simulator's smoke.
- Light Power On Scene controls the light intensity over all scene objects except for the Phoenix FD Simulator itself.


Many LUTs emulate the film process. Film emulation gives you mid-tune control in an image. In this case, I use a LUT file called - 8650 Log from IWLTBAP. You don't have to use this specific LUT file, try any other LUT that works for you. Alternatively, you can achieve similar results by adjusting Levels & Curve in V-Ray Frame Buffer. You might need to sharpen your skill but you will get there.
Be sure to tick the "Save in image" if you want your rendering baked with the LUT. You can also tune down the LUT effect by reducing the weight in the VFB.

Summarize
Here are what we do to improve the smoke shading:
- Lower the value of "Light Power on Self and Light Power on Scene"
- Lower the value of Physically Base
- Apply a LUT file to the final image
Final animation
Download
Here is the download link to the 3ds Max scene file. Note, you need Phoenix FD 4 and cebas thinkingParticles 6 to run the scene. The download pack does not include the HDR file (Winter Lake 01) nor the LUT file. However, for the HDRI, you can download it from HDRI Haven.
Enjoy your simulation project with Phoenix FD!
Tags:
3dsMax
tips & tricks
0 comments